
Water Quality Using Arduino And Turbidity Sensor

Introduction
Being able to efficiently monitor water quality may be a significant instrument for guaranteeing secure and pure drinking supplies. Water quality is an important problem in our everyday life. We will investigate the use of an Arduino and a turbidity sensor to detect the quality of water in this do-it-yourself project. A fluid’s cloudiness or haziness brought on by a high number of individual particles is referred to as turbidity. Since turbidity frequently signals the existence of suspended particles and contaminants, monitoring it can aid in the assessment of the quality of the water. You can simply test the quality of your water by making your own turbidity meter using an Arduino and a turbidity sensor module.
Components Required
- Solderless Breadboard
- Arduino UNO
- 16×2 LCD Display
- Turbidity Sensor Module
- 10k Variable Resistor
- 100R Resistor
- Male to Male Jumper Wires
- Male to Female Jumper Wires
- Hard Jumper Wire
- Battery Clip
- 9V Battery
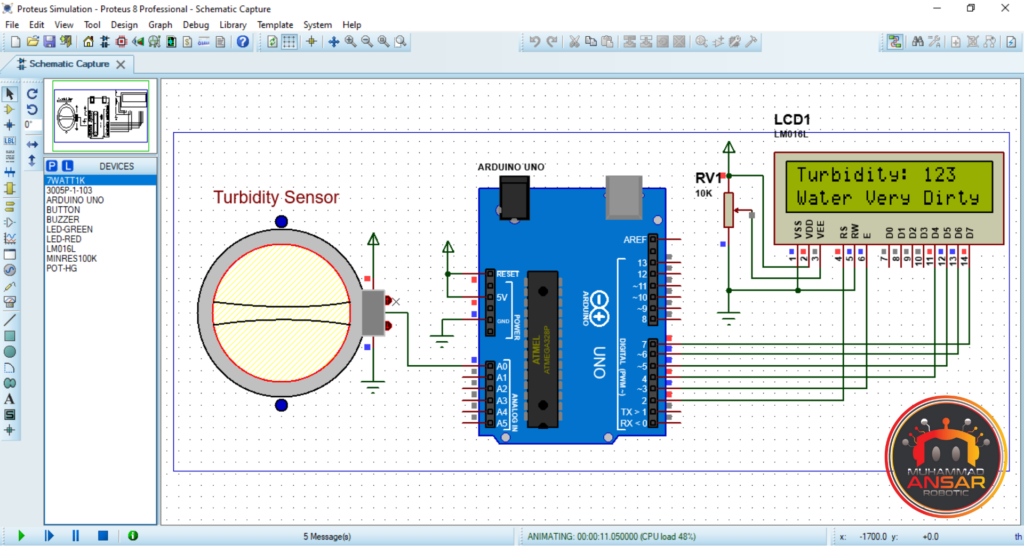
Proteus Simulation
Open the simulation file on Proteus 8. An Arduino UNO is used as a microcontroller. A 16×2 LCD is used as display. It displays the turbidity value of water in first row. In second row, it shows the attributes of water like clean, dirty or very dirty. A turbidity sensor is used. The values are varied from turbidity sensor to check the code’s working before implementing it on hardware.
Circuit Diagram
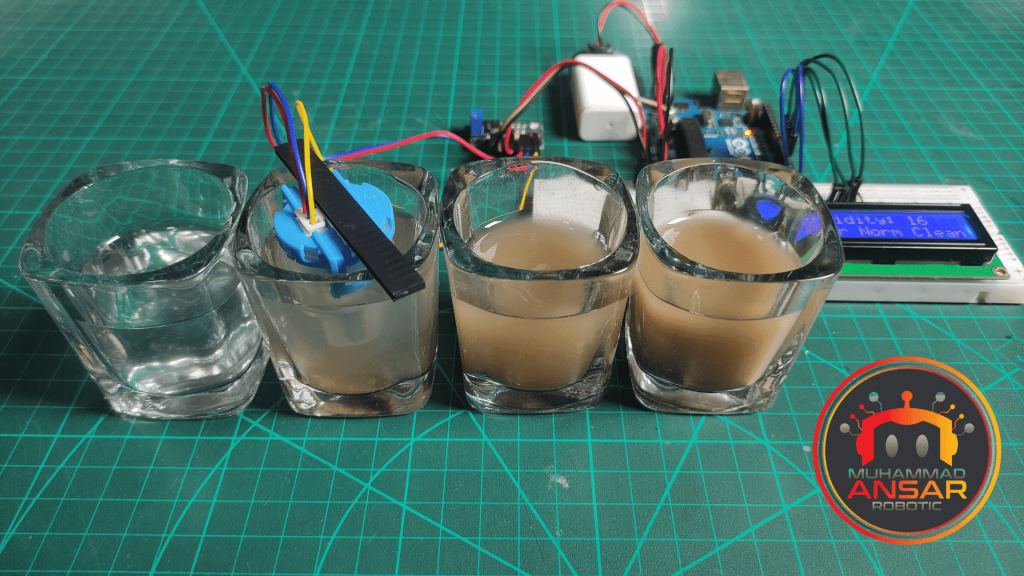
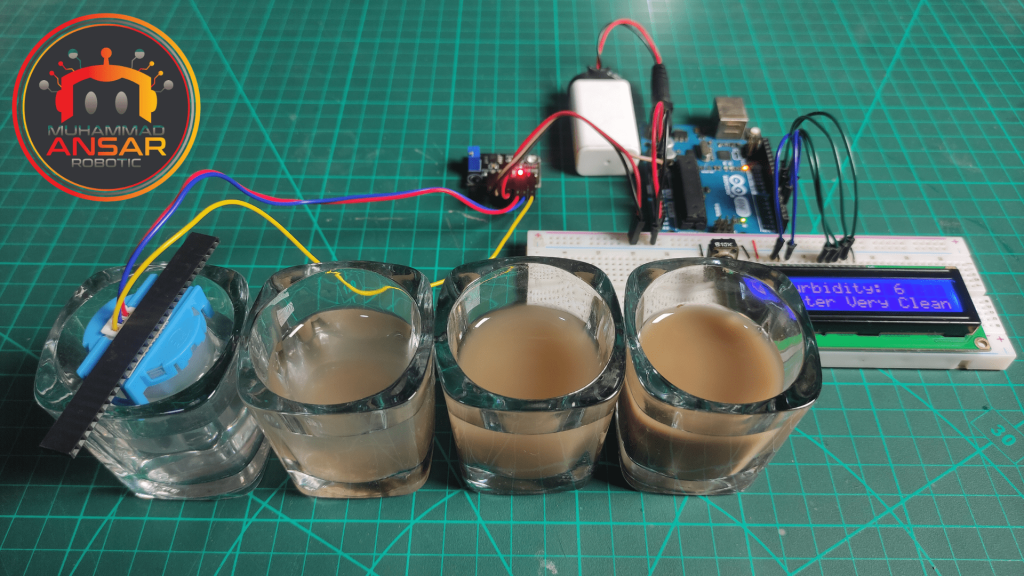
First of all, a 9 volts battery is used as power source. An Arduino UNO is used as a microcontroller. A turbidity sensor is used. A 16×2 LCD used to display the turbidity value and quality status of water. A 10k variable resistor is used. Different water samples are taken in glass for testing.
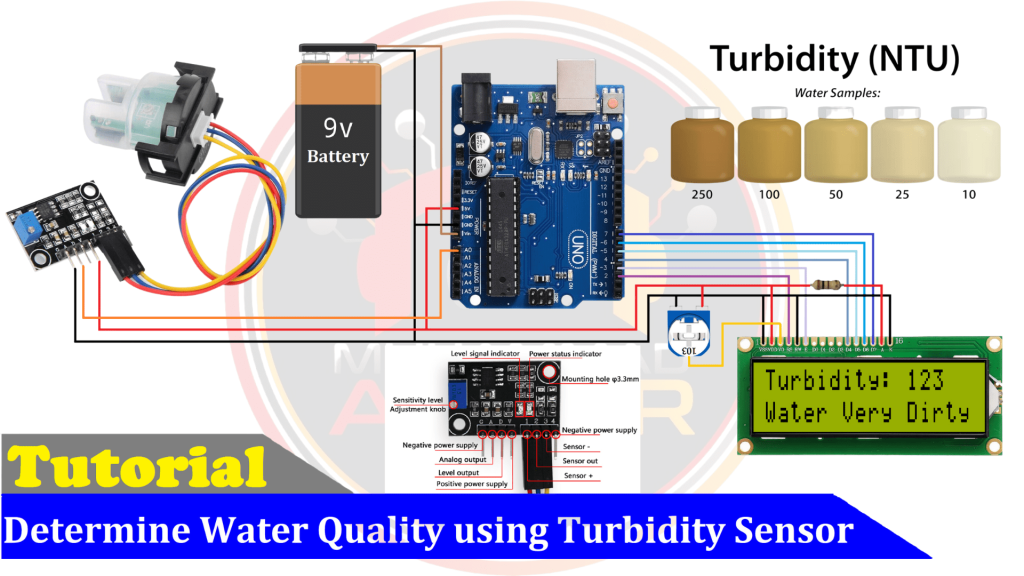
Ensure that every part, including the LCD display, turbidity sensor, Arduino, and other parts, is connected appropriately.
Arduino IDE Code
#include<LiquidCrystal.h>
LiquidCrystal lcd(2, 3, 4, 5, 6, 7);
#define sensor_pin A0
int read_ADC;
int ntu;

void setup(){// put your setup code here, to run once
pinMode(sensor_pin, INPUT);
lcd.begin(16, 2); // Configura lcd numero columnas y filas
lcd.clear();
lcd.setCursor (0,0);
lcd.print("   Welcome To   ");
lcd.setCursor (0,1);
lcd.print("Turbidity Sensor");
delay(2000);
lcd.clear();
}

void loop(){

read_ADC = analogRead(sensor_pin);
if(read_ADC>208)read_ADC=208;
ntu = map(read_ADC, 0, 208, 300, 0);

lcd.setCursor(0,0);
lcd.print("Turbidity: ");
lcd.print(ntu);
lcd.print("  ");
lcd.setCursor(0,1);//set cursor (colum by row) indexing from 0
if(ntu<10)            lcd.print("Water Very Clean");
if(ntu>=10 && ntu<30) lcd.print("Water Norm Clean");
if(ntu>=30)           lcd.print("Water Very Dirty");
delay(200);
}
Explanation
The code starts by initializing the LCD display and specifying the sensor pin (A0), among other prerequisites. The setup step sets the amount of rows and columns on the LCD, clears the screen, shows a greeting, and then clears the screen once more. The turbidity sensor, which is linked to pin A0, provides an analog value that the code continually reads during the main loop. The NTU (Nephelometric Turbidity Units) scale, which is frequently used to assess turbidity, is then mapped to this number. The first line of the LCD shows the mapped NTU value.
Furthermore, a matching message describing the water quality as “Water Very Clean,” “Water Norm Clean,” or “Water Very Dirty” is printed on the second line dependent on the NTU number. To ensure a consistent reading and regularly update the display, the code includes a 200 millisecond delay. The mapping of the sensor’s analog data to the NTU scale, which enables users to evaluate water quality based on turbidity levels and provides a visual indicator on the LCD display, is the crucial component of the code.
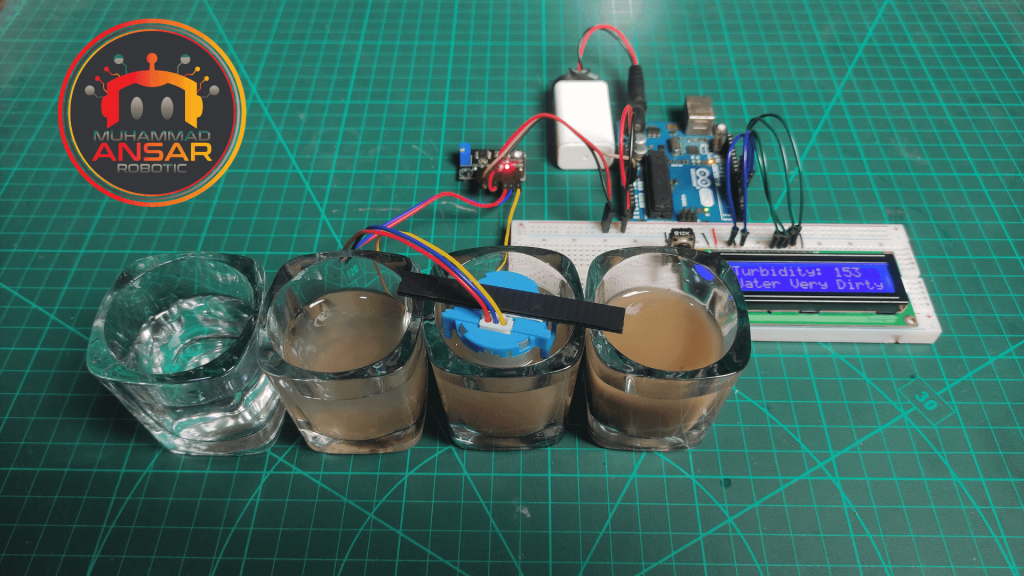
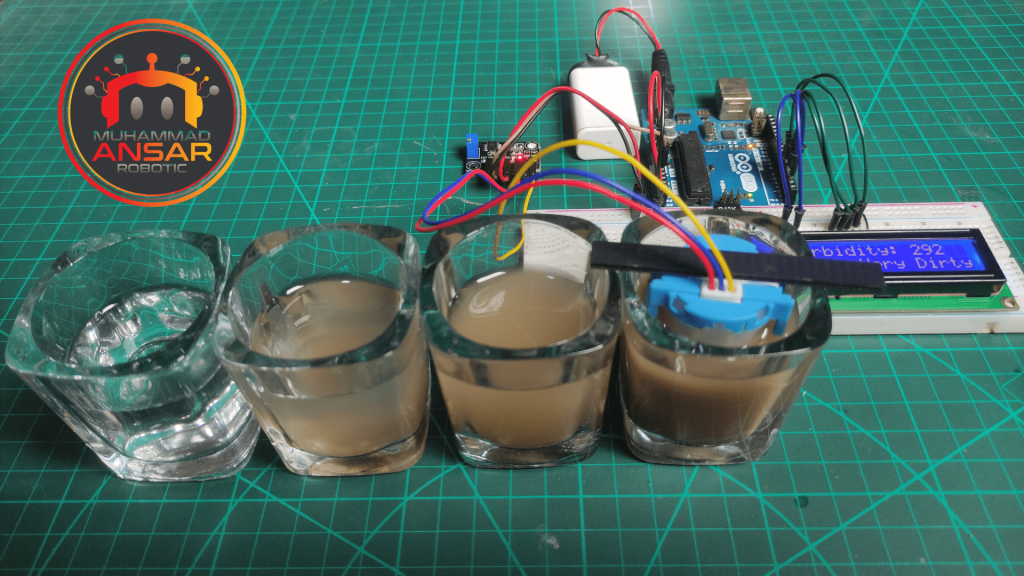
Hardware Testing
The fun part is almost here: assembly and testing of your homemade turbidity meter. Assemble the parts in accordance with your circuit schematic, program the Arduino with the code, and begin water quality monitoring. It is possible to evaluate it using several water samples and observe changes in turbidity readings.
Conclusion
For educational, environmental monitoring, or personal usage, this homemade turbidity meter might be a useful instrument for determining how clean a water supply is. You may build a customized water quality monitoring system and learn more about the water you use on a daily basis by following the instructions provided in this blog article. This activity may be enjoyable and informative, and it can help people gain a better understanding of environmental conservation and water quality, regardless of whether they are students, hobbyists, or environmental enthusiasts.
3 responses to “Water Quality Using Arduino And Turbidity Sensor”

How can I buy this Project
where are you from?
We stumbled over here from a different web address and thought I might as well check things out. I like what I see so now i am following you. Look forward to finding out about your web page yet again.


3 thoughts on “Water Quality Using Arduino And Turbidity Sensor”
 Justine Oguta says:
How can I buy this Project
We stumbled over here from a different web address and thought I might as well check things out. I like what I see so now i am following you. Look forward to finding out about your web page yet again.
Leave a Reply