
Wireless Temperature And Humidity Monitoring System With Mobile App
Introduction
The demand for effective and user-friendly monitoring systems is always rising in our technologically driven era. One such project is the development of a Bluetooth-enabled wireless temperature and humidity monitoring system, which makes use of MIT App Inventor’s ease of use and adaptability. This project makes use of an Arduino Uno, DHT-11 sensor, HC-05 Bluetooth module, and a few other necessary parts to enable you to easily monitor environmental conditions. Come along on this adventure as we explore the nuances of developing a reliable temperature and humidity monitoring system.
Components Required
- Solderless Breadboard
- Arduino UNO
- HC-05 Bluetooth Module
- DHT-22 Temperature and Humidity Sensor
- Male to Male Jumper Wires
- Battery Clip
- 9V Battery
Proteus Simulation
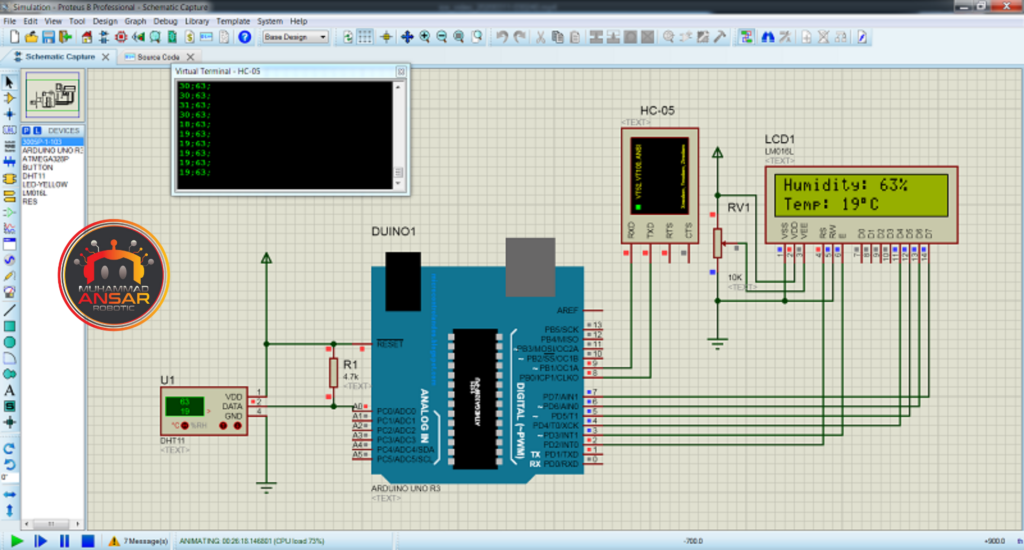
It’s advisable to use Proteus to simulate the circuit before beginning the actual construction. Prior to implementing the hardware, this process verifies that the connections are accurate and aids in locating and resolving any possible problems.
Open the simulation file on Proteus 8. Here, Arduino UNO is used as a microcontroller. A HC-05 Bluetooth module is used. A 16×2 LCD is used as a display. DHT11 temperature and humidity sensor is used. The data pin of the sensor is connected to the A0 pin of the Arduino UNO. Virtual terminal is used that will receive the data by Bluetooth. Run the code and copy hex file address. Then place the hex file address in Arduino UNO and run the simulation. The values of temperature and humidity will be shown on the LCD. The virtual terminal will shoe the received values by Bluetooth.
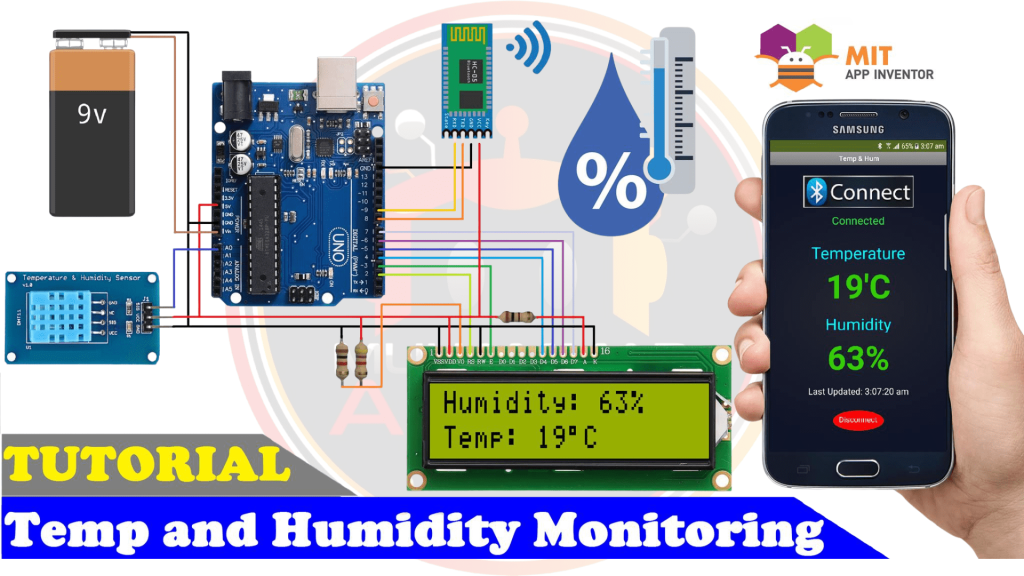
Circuit Diagram
For the monitoring system to be constructed properly, a clear and simple circuit diagram is essential. With parts like the Arduino Uno, DHT-11 sensor, 16×2 LCD screen, and HC-05 Bluetooth module, the schematic should show the connections so that anyone trying to build the project can understand it. In this circuit, a 9 volts battery is used as a power source. The DHT-11 sensor detects both temperature and humidity. Its output pin is connected to A0 pin of the Arduino UNO, that is used as a microcontroller. The HC-05 bluetooth module is used, that will make wireless connection with the mobile app. The Rx pin is connected to pin 9 and the Tx pin is connected to pin 8 of Arduino UNO. A 16×2 LCD is used as a display.
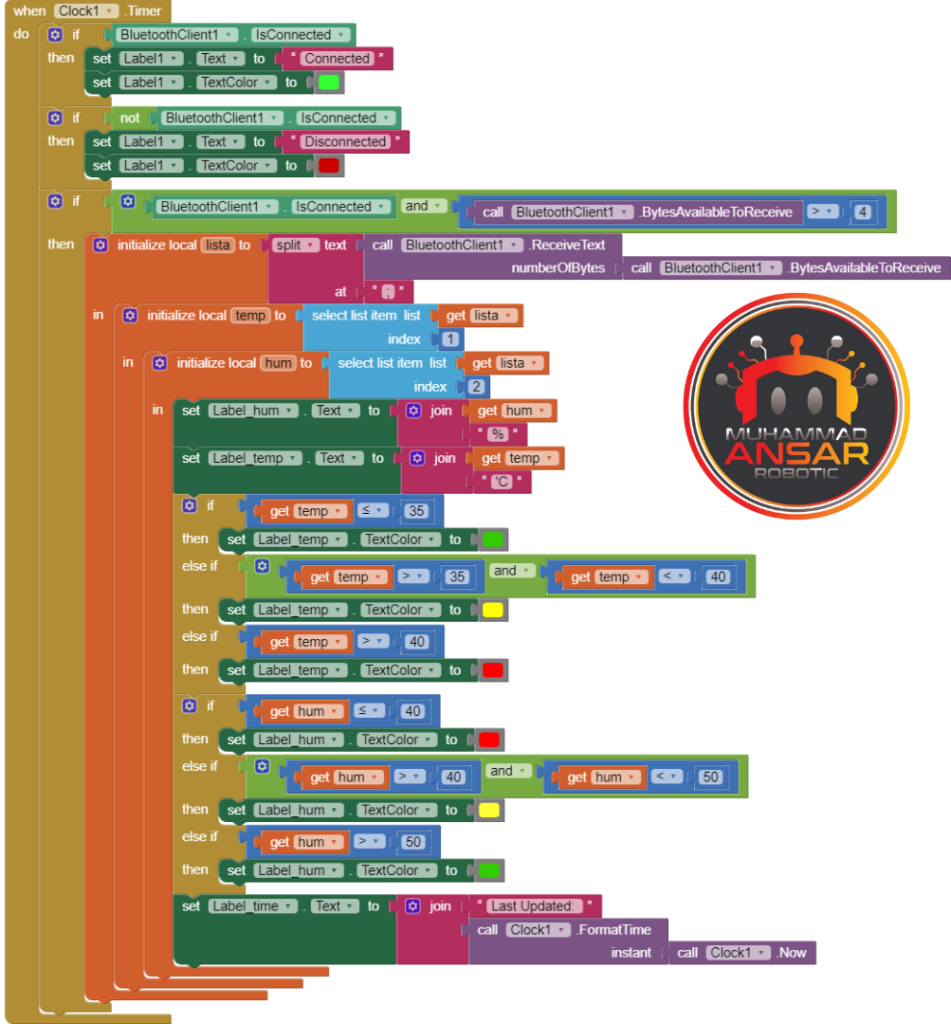
MIT App Inventor
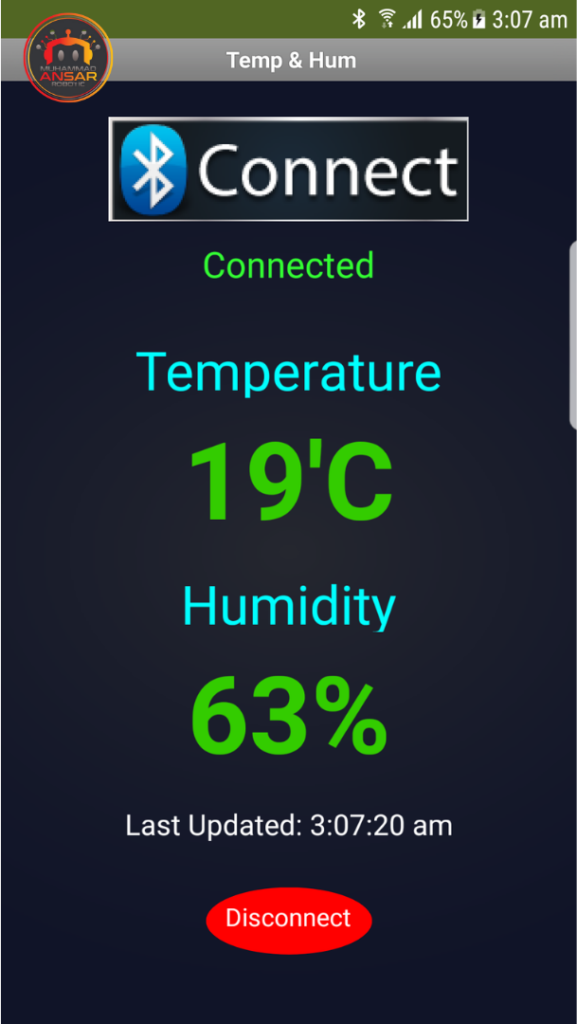
MIT App Inventor, a visual programming environment that makes creating Android applications easier, improves the project’s interaction. Examine how App Inventor and Bluetooth may work together to provide a smooth connection between your smartphone and the monitoring system.

Arduino IDE Code
#include <SoftwareSerial.h>
SoftwareSerial bt(8, 9); // RX, TX

#include <LiquidCrystal.h>
#include "dht.h"
#define dataPin A0
LiquidCrystal lcd(2, 3, 4, 5, 6, 7);
dht DHT;

int temp;
int hum;

void setup() {

 Serial.begin(9600);
 bt.begin(9600);
 Serial.println("Ready");

  lcd.begin(16,2);
  lcd.setCursor(0,0);
  lcd.print(" WELCOME To  My ");
  lcd.setCursor(0,1);
  lcd.print("YouTube  Channel");
  delay(2000);
  lcd.clear();
}

void loop(){
  int readData = DHT.read11(dataPin);

  hum = DHT.humidity;
  temp = DHT.temperature;

  lcd.setCursor(0,0);
  lcd.print("Humidity: ");
  lcd.print(hum);
  lcd.print("% ");

  lcd.setCursor(0,1);
  lcd.print("Temp: ");
  lcd.print(temp);
  lcd.print((char)223); //degree symbol
  lcd.print("C ");

 bt.print(temp); //send distance to MIT App
 bt.print(";");
 bt.print(hum); //send distance to MIT App
 bt.println(";");

  delay(1000);
}
Explanation
Two libraries are included in the code: LiquidCrystal, which interfaces with the LCD, and SoftwareSerial, which creates a software-based serial connection for the Bluetooth module. The temperature and humidity data acquired from the DHT-11 sensor are stated to be stored in the temp and hum variables. The setup() function sets up SoftwareSerial for Bluetooth connectivity, starts Serial communication at a baud rate of 9600 for debugging, initializes the LCD, and displays a welcome message for two seconds. The DHT-11 sensor measures the temperature and humidity in the void loop() function. Temperature and humidity are shown on LCD. Through the Bluetooth module, the temperature and humidity readings are sent to the MIT App Inventor. Every second, the cycle is repeated. This code uses the HC-05 module to read temperature and humidity from a DHT-11 sensor, show the results on an LCD, and send the data via Bluetooth. The temperature and humidity values in the Bluetooth data transfer are structured with semicolons to divide them, which makes it appropriate for interaction with the MIT App Inventor for additional viewing and monitoring.
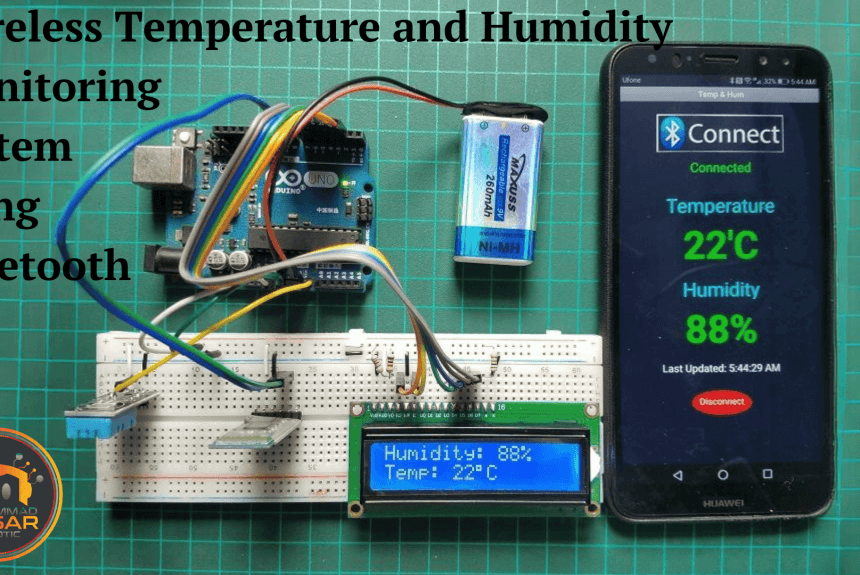
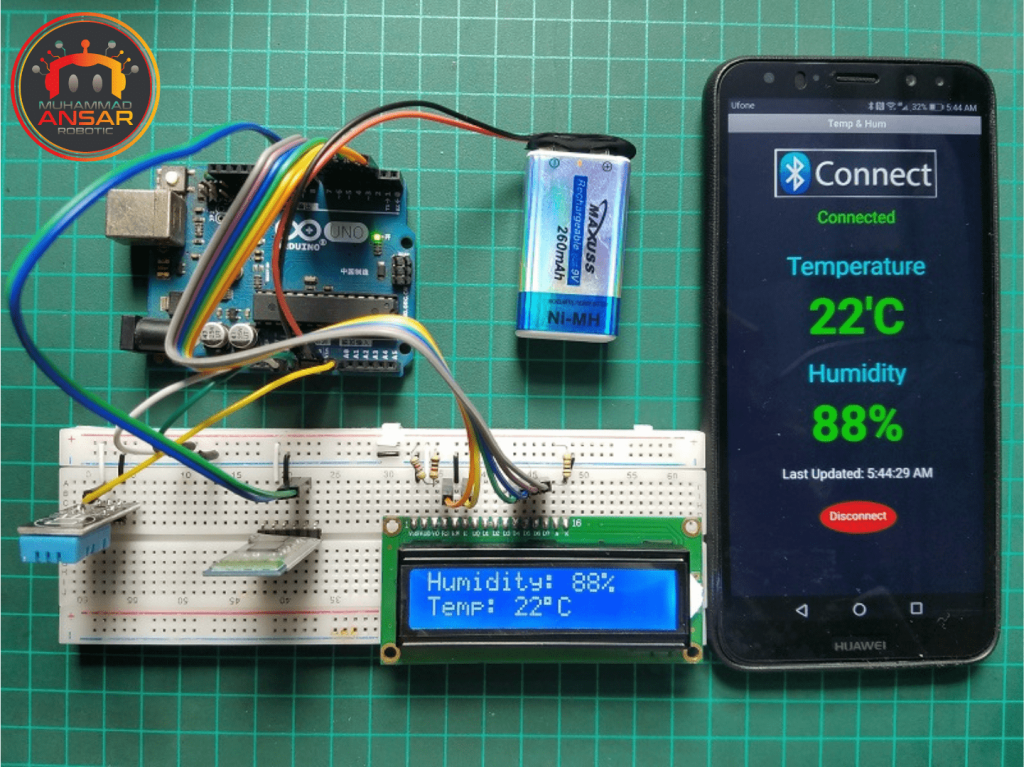
Hardware Testing
It’s now possible to test the system after the circuit has been put together and the code has been submitted. Examine how the project’s components interact in the actual world to learn more about its practical aspects. Check that the temperature and humidity data are accurate, and make sure the MIT App Inventor interface and Bluetooth connection are working well. On the mobile application, the sensed temperature and humidity values are received via bluetooth and displayed on the app.
Conclusion
To sum up, the Wireless Temperature and Humidity Monitoring System provides an easy-to-use and entertaining method of monitoring ambient conditions. With the help of the Arduino, DHT-11 sensor, HC-05 Bluetooth module, and MIT App Inventor, this project opens up a world of monitoring and automation possibilities. This project may be used for educational or personal reasons, and it provides an introduction to the exciting realm of DIY electronics and the Internet of Things.
2 responses to “Wireless Temperature And Humidity Monitoring System With Mobile App”

Hola soy estudiante y por favor necesito la apk, si me podrías pasar los archivos me seria de gran ayuda


2 thoughts on “Wireless Temperature And Humidity Monitoring System With Mobile App”
 diego tapie says:
Hola soy estudiante y por favor necesito la apk, si me podrías pasar los archivos me seria de gran ayuda
Leave a Reply