
Automatic Digital Product Counter with Arduino for Production Lines

Introduction
In the world of manufacturing, efficiency and accuracy are key to staying competitive. One of the most critical aspects of production is ensuring that products are counted correctly as they move along the production line. Manual counting is not only time-consuming but also prone to human error. This is where an Automatic Digital Product Counter using Arduino comes in, providing a reliable, automated solution for tracking product quantities in real-time.
With this project, you can automate the counting process on your production line, reducing errors and increasing productivity. Let’s dive into how this system works, what components are needed, and how to build it.
Components Required
To build this automatic product counter, you will need the following components:
- Arduino UNO (the brain of the system)
- 16×2 LCD Display with I2C module (for displaying the count and set points)
- IR Sensor (to detect products passing on the conveyor belt)
- Relay Module (to control the motor of the conveyor belt)
- DC Motor (for driving the conveyor belt)
- Push Buttons (for setting values and controlling the system)
- Buzzer (for audio notifications)
- Power Supply (12V 2A adapter)
How It Works
The IR sensor detects each product as it passes by on the conveyor belt. The Arduino reads this input and increments the count displayed on the LCD screen. You can set a target count using the push buttons, and once that count is reached, the system automatically stops the conveyor belt using a relay-controlled motor.
Key Features:
- Real-time Counting: The system counts products as they pass by in real-time.
- Set Point Functionality: You can set a target count, and once achieved, the system stops automatically.
- LCD Display: Displays both current count and set point for easy monitoring.
- User-friendly Interface: Simple buttons allow you to set values and reset counts easily.
- EEPROM Storage: The system saves your settings even if power is lost.
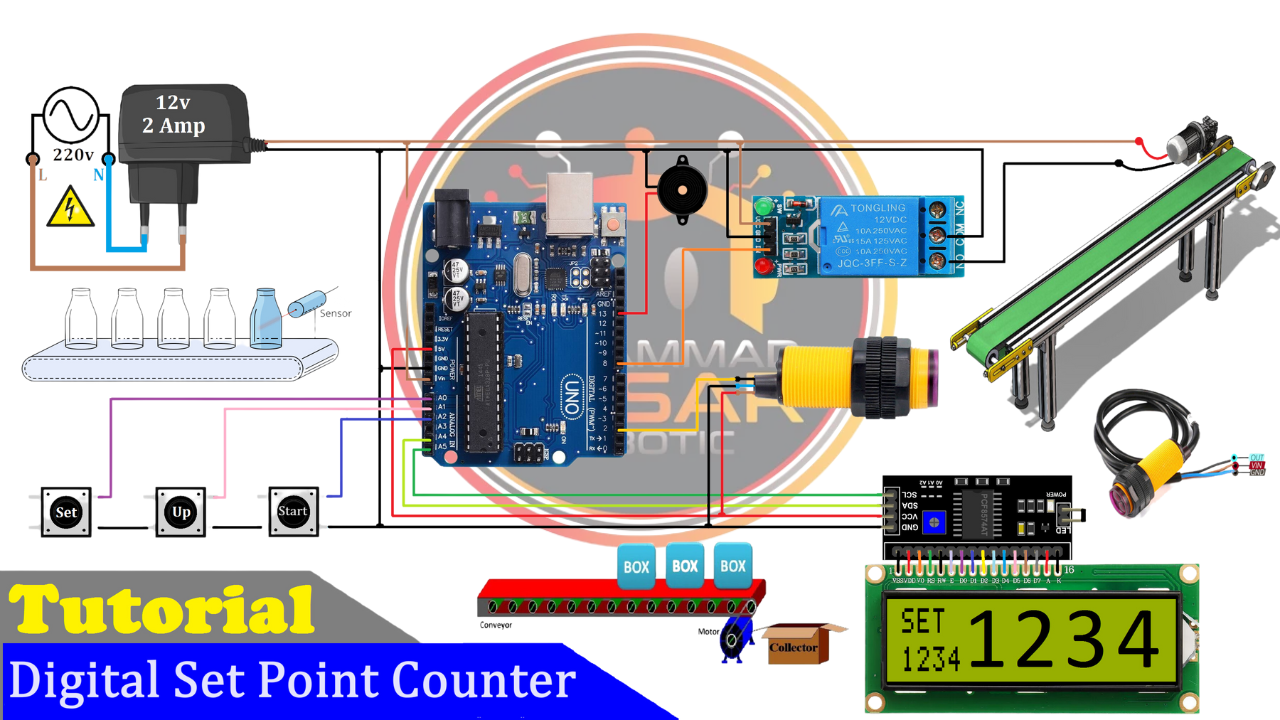
Circuit Diagram
Below is a detailed circuit diagram showing how each component is connected:
Circuit Diagram
The Arduino UNO acts as the central controller, interfacing with the IR sensor for product detection, push buttons for user inputs, and an LCD display for visual feedback. The relay module controls the DC motor that drives the conveyor belt.
Proteus Simulation
Before building the hardware, it’s recommended to simulate your circuit using Proteus software. This allows you to test your design virtually before committing to physical components.
Proteus Simulation
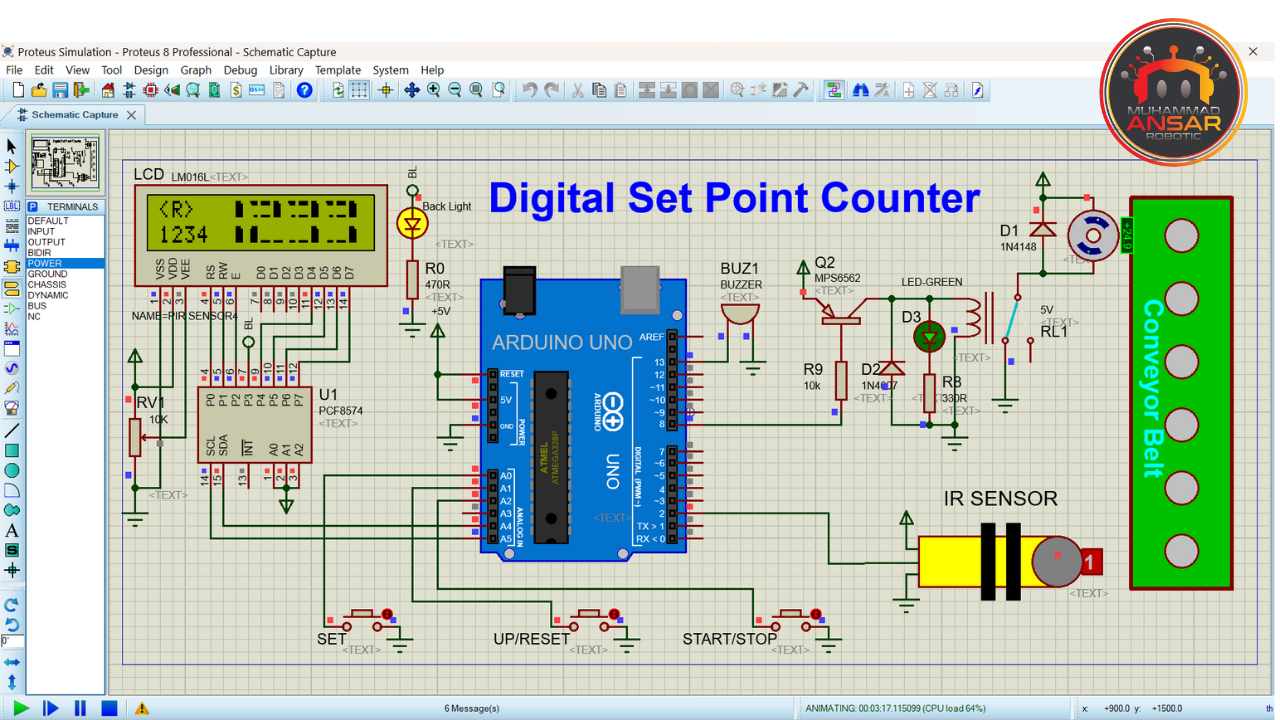
Steps to Simulate:
- Open Proteus and import your circuit design.
- Generate a hex file from your Arduino code.
- Run the simulation to ensure everything works as expected.
Arduino Code
Here’s a simplified version of the code that controls your product counter:
cpp
{Code
}
This code handles:
- Reading input from the IR sensor
- Incrementing and displaying product counts
- Stopping the motor when the set point is reached
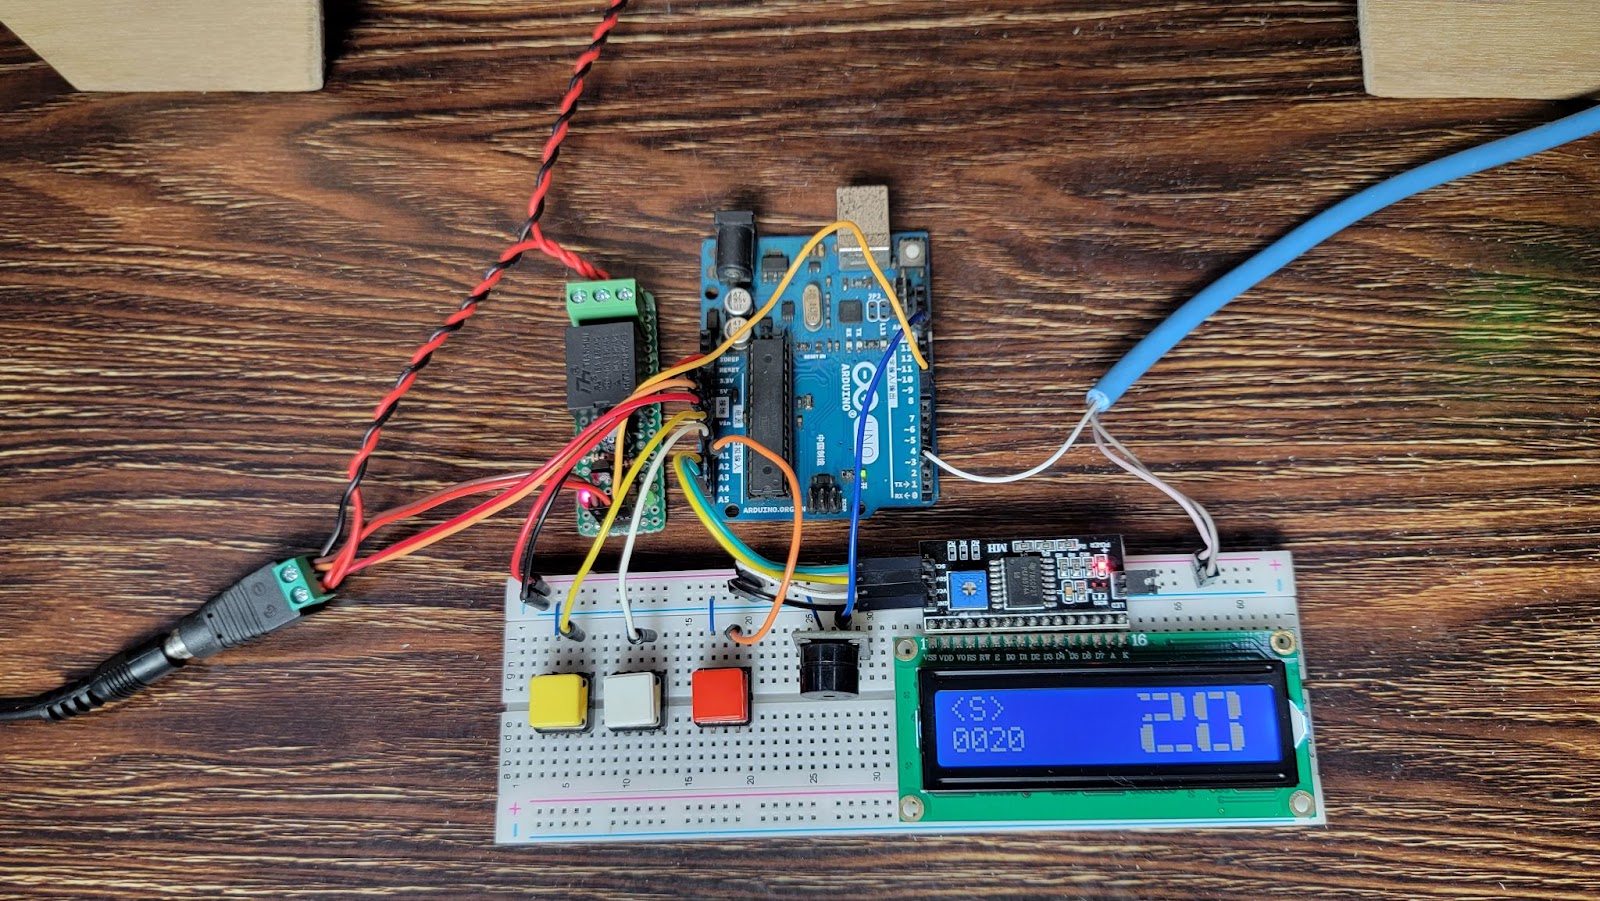
Hardware Implementation
Once you’ve verified your design through simulation, it’s time to build it! Follow these steps:
- Assemble all components according to the circuit diagram.
- Upload your Arduino code using Arduino IDE.
- Power up your system with a 12V power supply.
- Test by running products through your conveyor belt to ensure accurate counting.
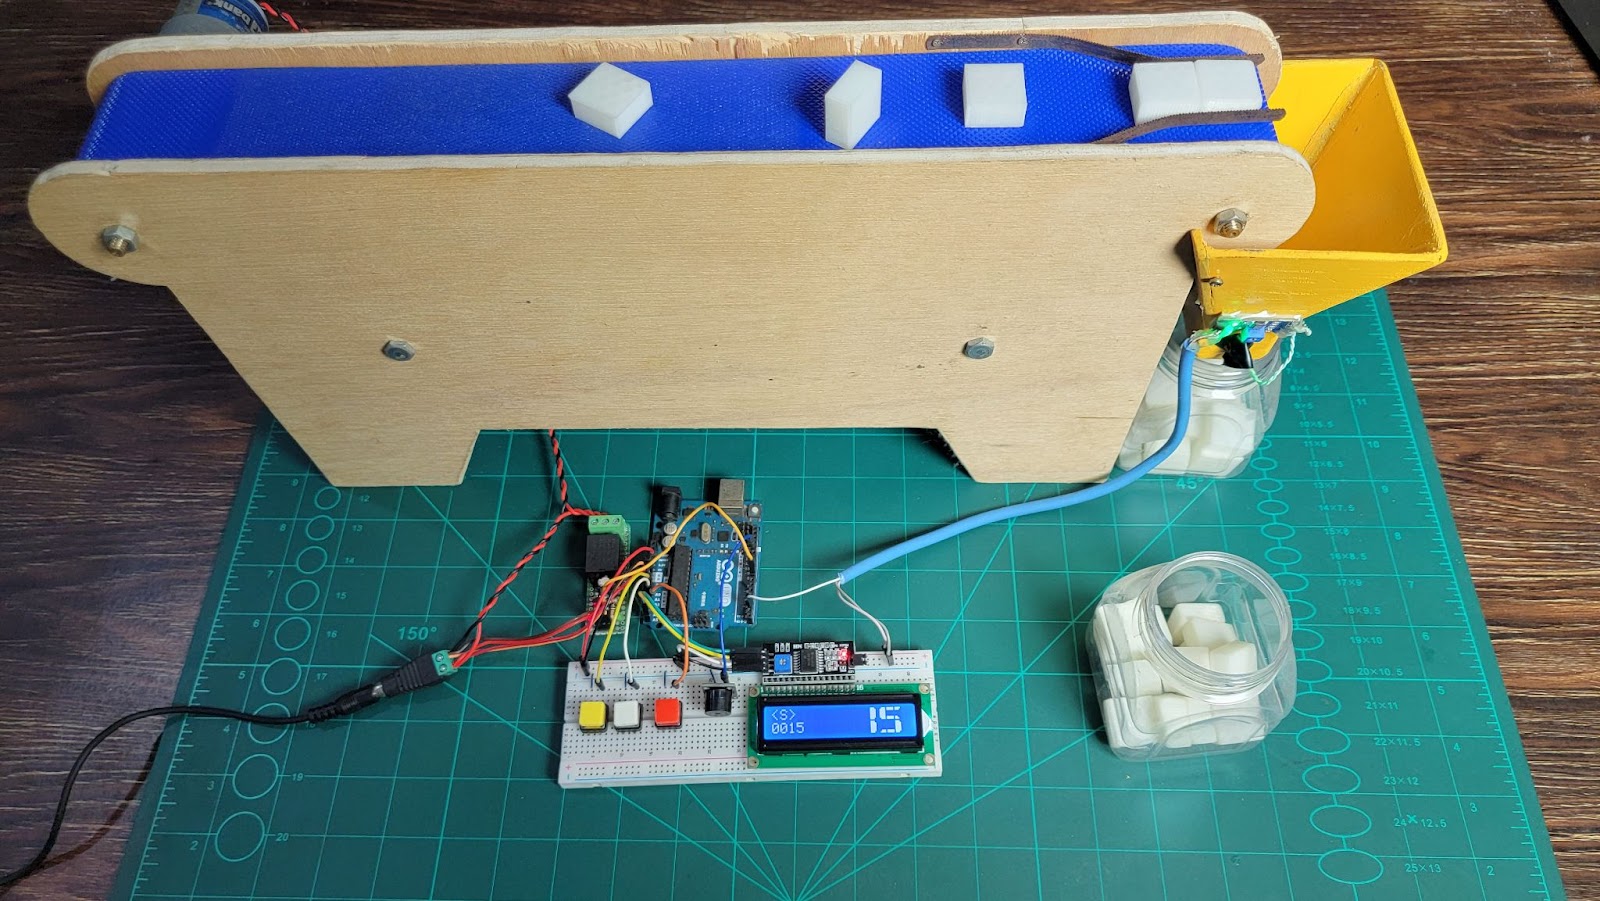
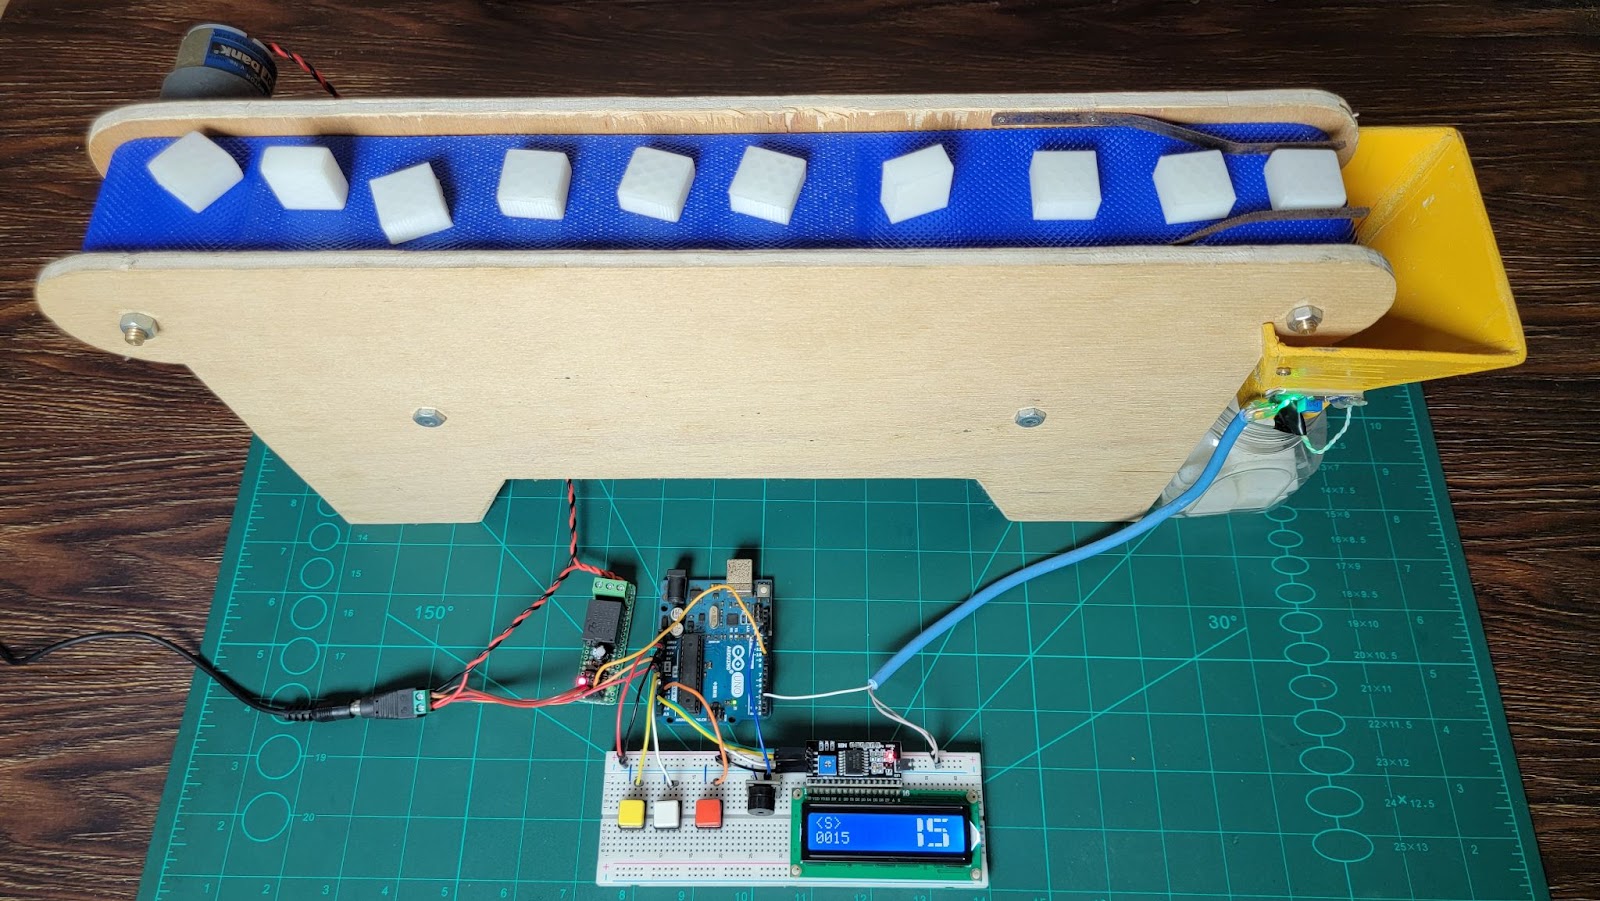
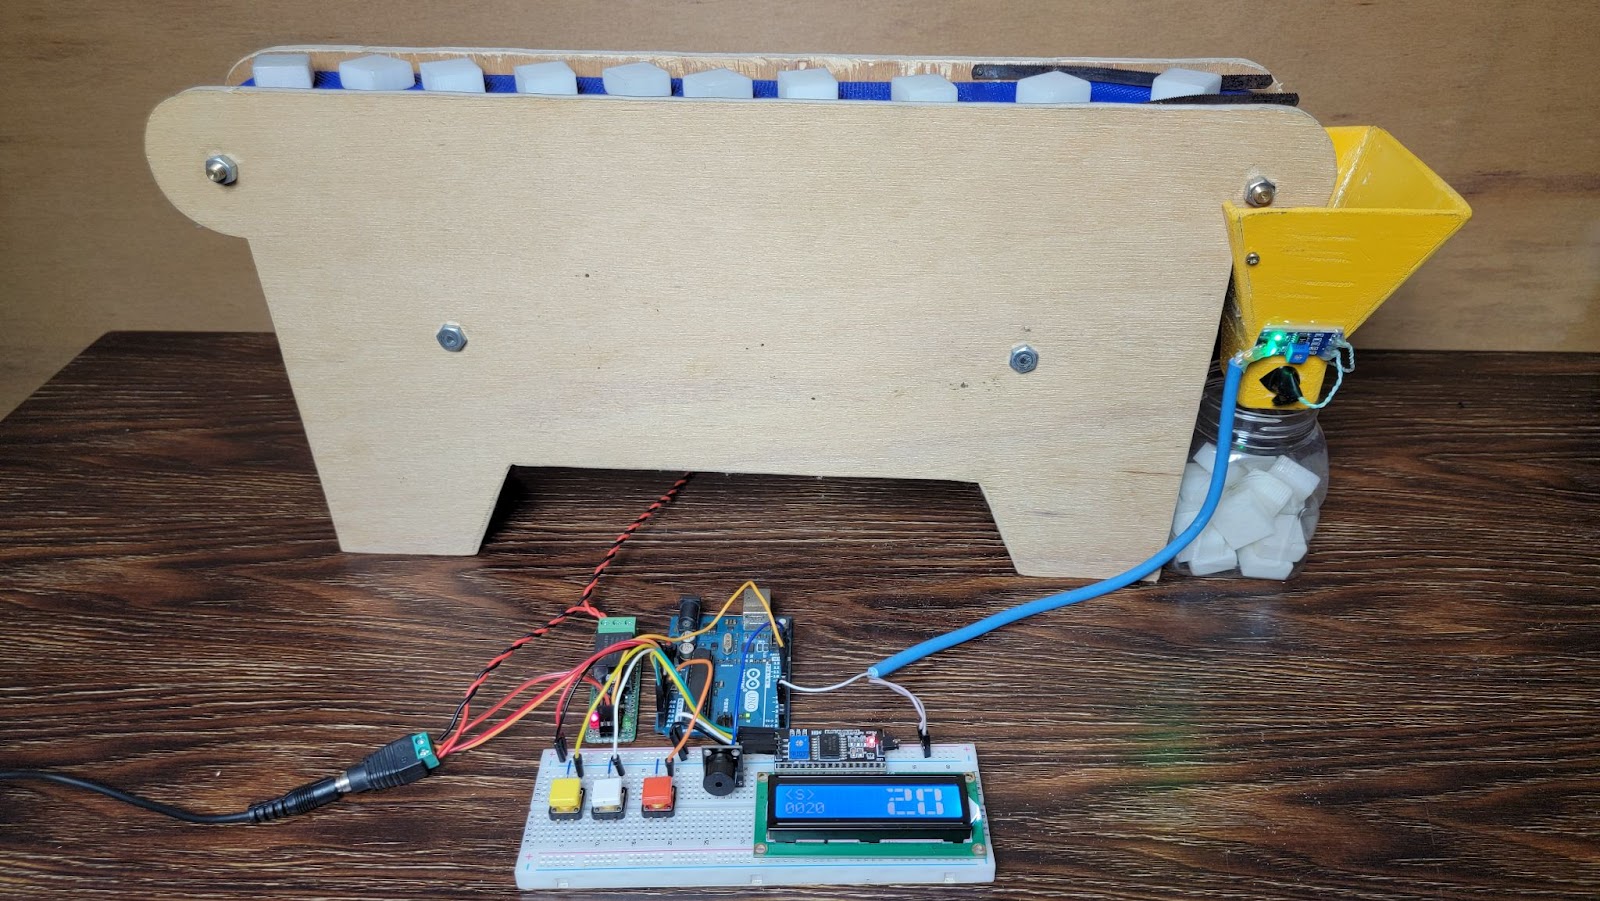
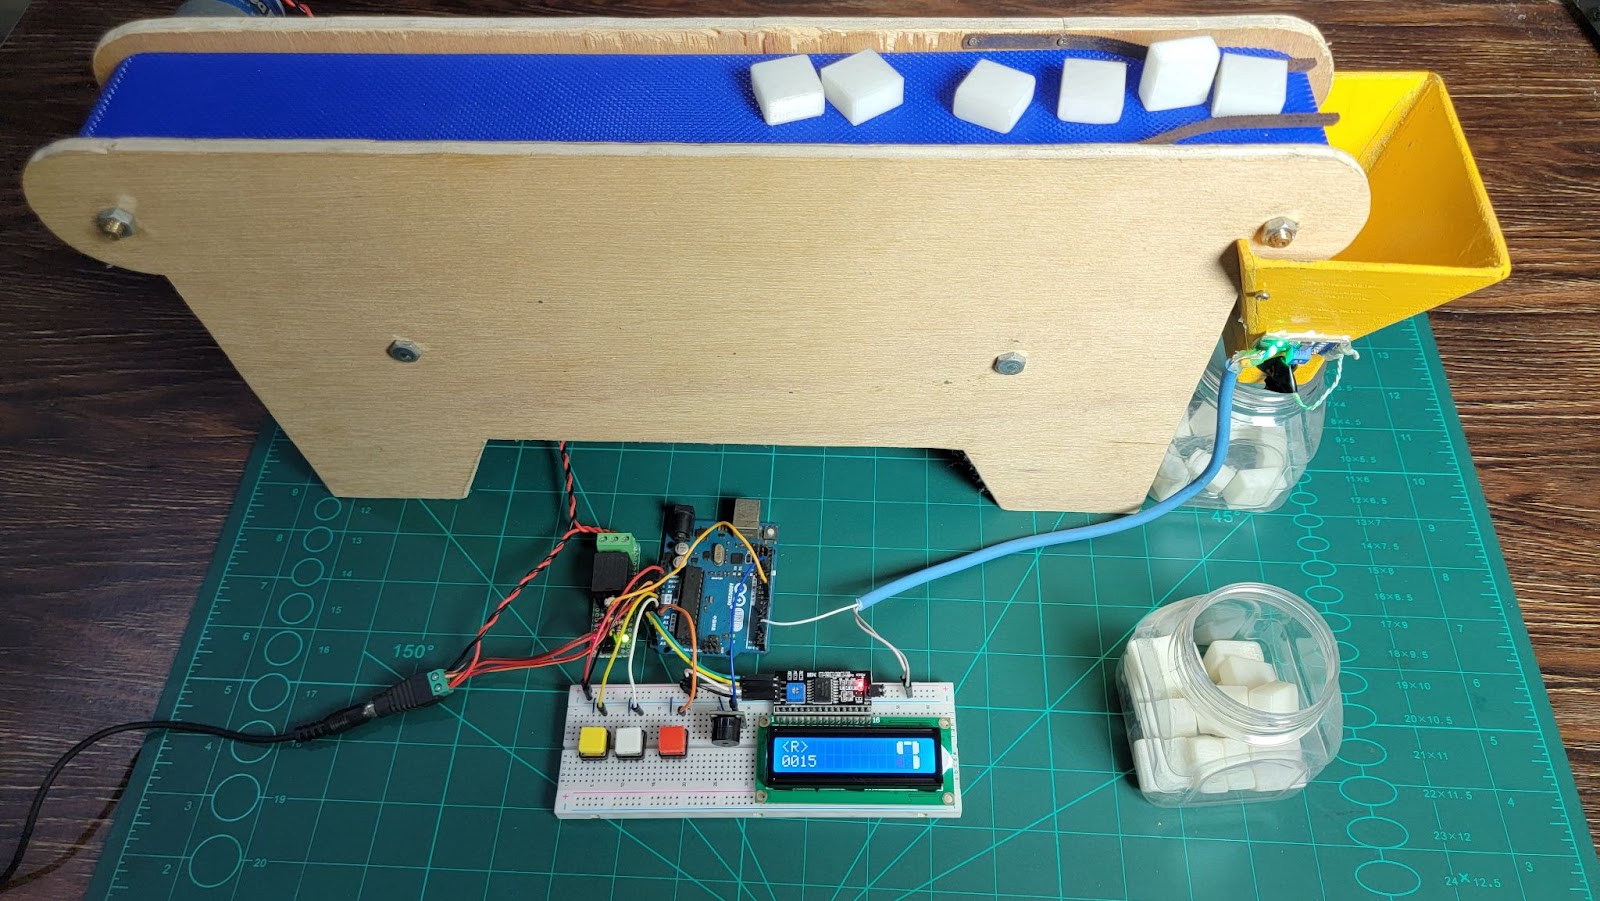
Here’s an example of what your final setup might look like:
Hardware Setup
Conclusion
The Automatic Digital Product Counter with Arduino is an ideal solution for automating counting tasks on production lines. It ensures accuracy while reducing manual labor and errors associated with traditional counting methods. This project demonstrates how simple components like an IR sensor and Arduino can be combined to create a powerful tool for industrial applications.
By implementing this system in your production line, you can improve efficiency and focus on scaling up operations without worrying about miscounts or delays.
Images:
1. Hardware Setup: 2.Circuit Diagram:
3. Proteus Simulation: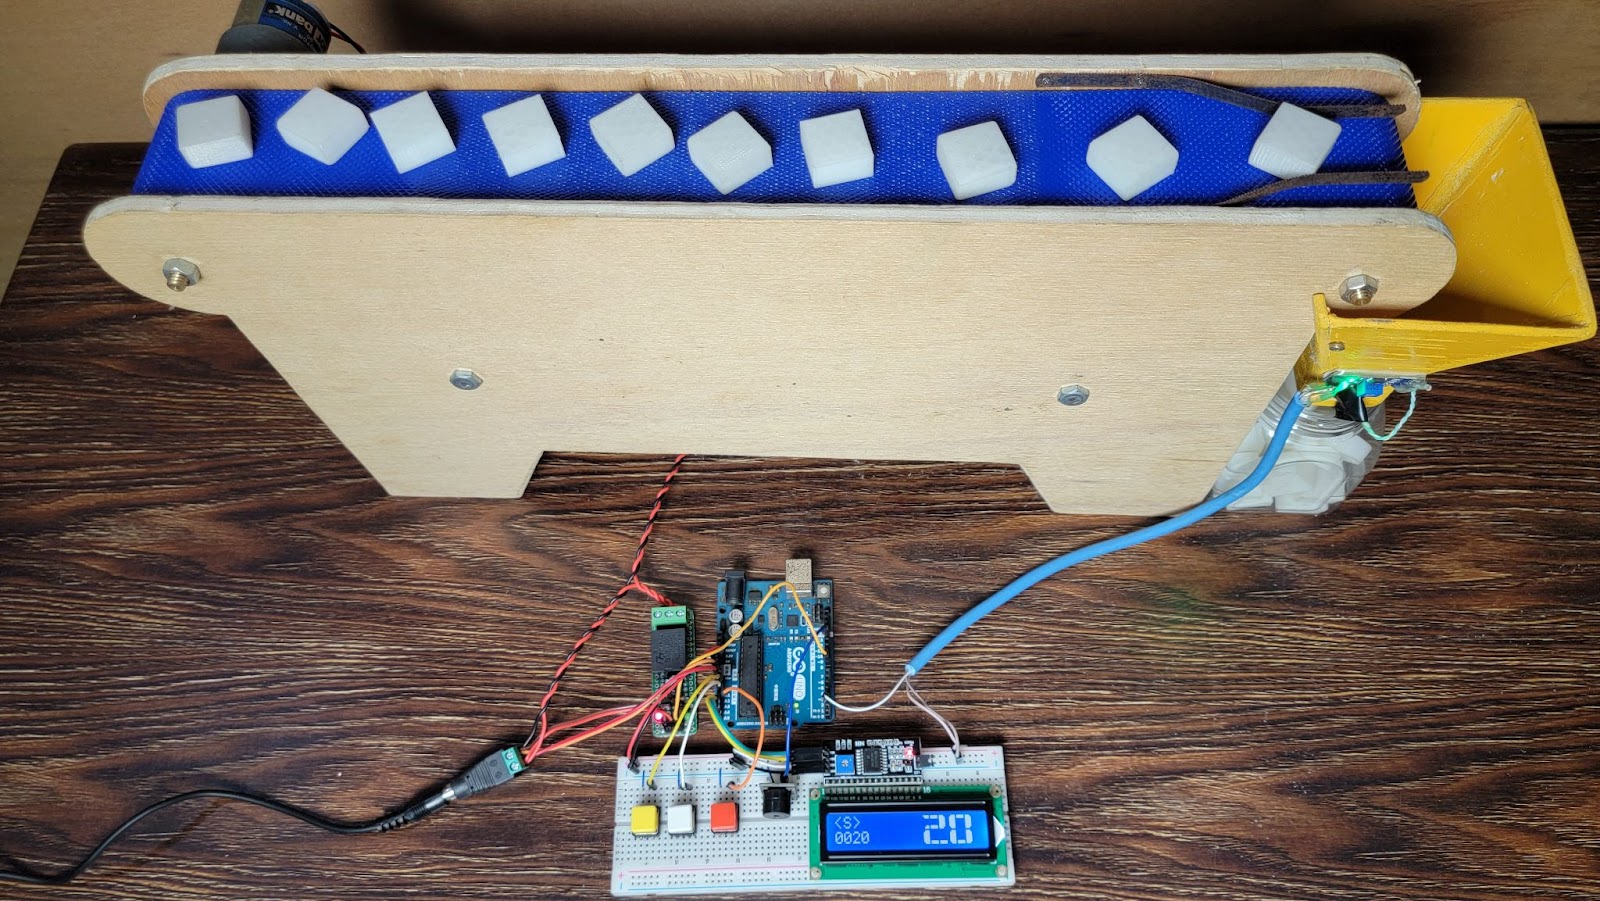
By automating your product counting process with this simple yet effective solution, you’ll save time, reduce errors, and increase overall productivity on your production line!
A good read, thank you!
welcome
Thanks for sharing such thorough information. It’s clear that a lot of research went into writing this.
thank you
This was both fun and informative.
thank you
Great job simplifying this topic.
thank you
The tips you shared here are simple but powerful. I’ve already started implementing a few!
good
It’s always nice reading your work.
thank you
Another quality post from you.
thank you
Definitely bookmarking this.
You’ve done an excellent job covering all the essentials. I’ll definitely be using this as a reference.
thank you
I wasn’t sure I’d get anything new out of this, but your perspective was refreshing and insightful. Thanks for sharing!
Bookmarking this for future reference.
Thanks for sharing such thorough information. It’s clear that a lot of research went into writing this.
Another great post from you.
It’s posts like these that keep me coming back.
I really found value in this.
Great to see content like this online.
Excellent summary of the topic.
Insightful and well-researched.
Thanks for taking the time to provide such detailed information. It really helped clear up my confusion.
Useful tips – thank you!
Thanks for your clear and practical advice. I’ll be using this post as a reference moving forward.
This helped me understand the topic better.
I always feel more informed after reading your posts. Keep delivering this kind of helpful content!
This is gold – thanks!
Really liked your take on this.
You make learning enjoyable. I never feel overwhelmed when reading your blog — thank you!
I’ve been following your blog and it never disappoints.
Very helpful article – appreciate your time!
This was an eye-opener! It gave me a whole new perspective I hadn’t considered before.
Great job simplifying this topic.
Exactly what I needed today.
I learned something new today – thanks!
I wasn’t expecting such a detailed post, but I’m glad I read through to the end. Very informative!
Thank you for shedding light on this.
Super helpful for someone like me.
I’ll be sharing this with others.
Cheers for sharing such useful info!
Simple and helpful – great job!
thank you
Insightful and well-researched.
thank you
Helpful for beginners and experts alike.
Helpful for beginners and experts alike.
Great to see content like this online.
thank you
I’ll be recommending this post.
thank you
I really enjoyed reading your post.
thank you
I always learn something new here.
This post was incredibly well-structured and easy to follow. Looking forward to reading more from you!
thank you
Insightful and well-researched.
Great job as always!
thank you
Thanks for breaking it down so clearly.
Great job simplifying this topic.
I really found value in this.
Practical advice – thank you!
Really good explanation – well done!